Porsche Panamera wheel spacers Guide
If you are in doubt about wheel spacers…Dont be!
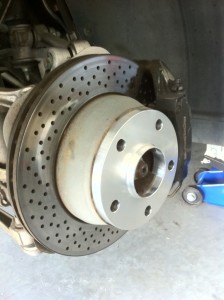
You have 3 types of wheel spacers to choose from for the Porsche Panamera without rubbing fenders. 5mm, 7mm and 15mm. I think 15mm spacers look very good on most wheel and make the car look a little different.
Whatever brand you choose make sure you get HUB CENTRIC (they install on the center of the wheel snugly) wheel spacers or you will have wheel balance problems.
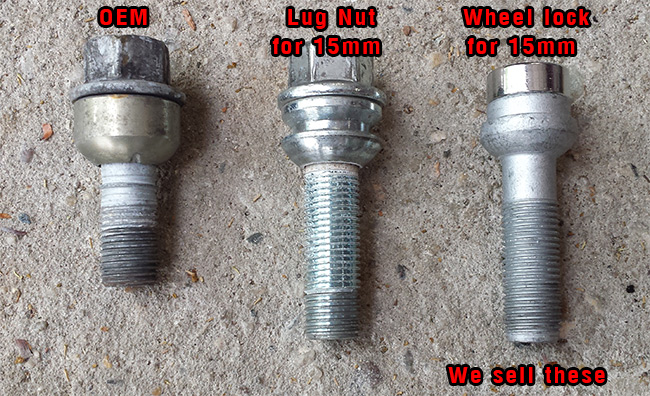
Most spacers will come with lug nuts. Here is a little guide on the lug nuts:
|
|
5mm spacers – dont require new bolts 7mm spacers – require 40mm shank bolts 15mm spacers – require 45mm shank bolts OEM bolt SPECS:
|
Some of you will require new WHEEL LOCKS.
Most Popular Setups:
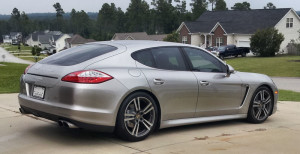
| for OEM 20″ Sport Spider Wheels (Photo) (wider than Turbo IIs by 0.5 inch (13mm)) |
| FRONT | REAR |
| 15 mm | 5 mm |
| OR just 10 mm all around looks good |
| for 20″ Turbo II Wheels (Photo) |
| FRONT | REAR |
| 5-7 mm | 15 mm (narrower width and higher offset at the rear) |
| OR just 15mm all around looks good. No rubs, no problem. |
| * Porsche only recommends up to 5mm on the rear, nothing on the front |
| for 19″ Turbo Wheels (Photo) |
| FRONT | REAR |
| 7 mm | 15 mm |
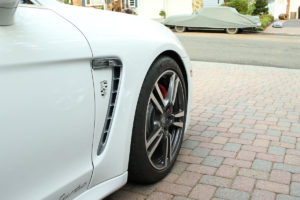
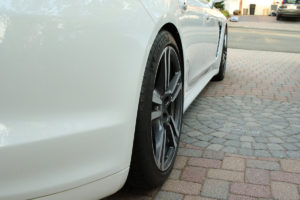
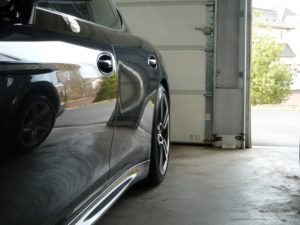
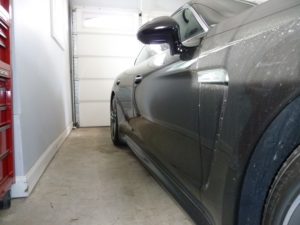
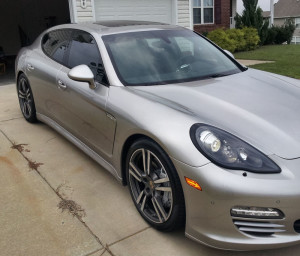
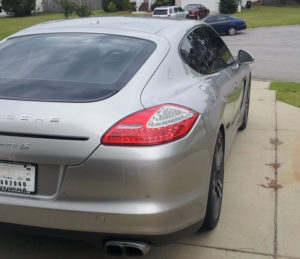
Here are some pictures with spacers on the Panameras
|
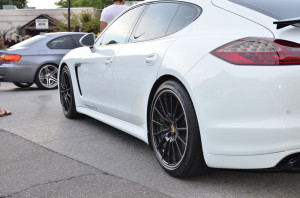
Turbo II wheels FRONT – 15 mm spacers |
|
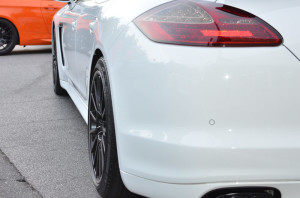
Turbo II wheels REAR – 15 mm spacers |
|
Turbo II wheels FRONT – 15 mm spacers |
|
Turbo II wheels REAR – 15 mm spacers |
|
Turbo II wheels REAR – 5 mm spacers |
|
Turbo II wheels FRONT – 5mm spacers |
|
Turbo II wheels REAR – 7 mm spacers |
|
|
Turbo II wheels FRONT – 5mm spacers REAR – 7 mm spacers |
|
Sport Spider Wheels FRONT – 10mm spacers |
|
Sport Spider Wheels REAR – 10 mm spacers |
DIY – Panamera Radio & PCM removal
Preliminary work
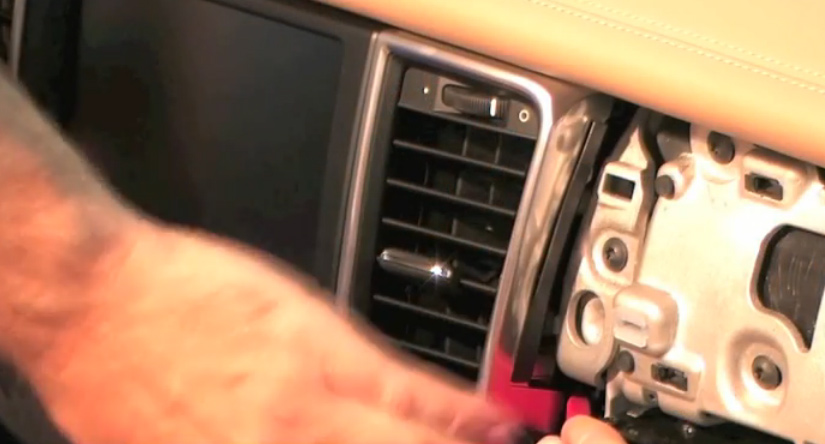
- Remove the two air vents at the car radio. See: Panamera Center vent removal
Removing car radio
- Switch off ignition and remove remote control.
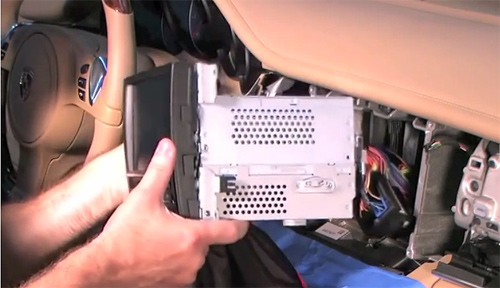
- Unscrew the four fastening screws -1- and pull out the car radio.
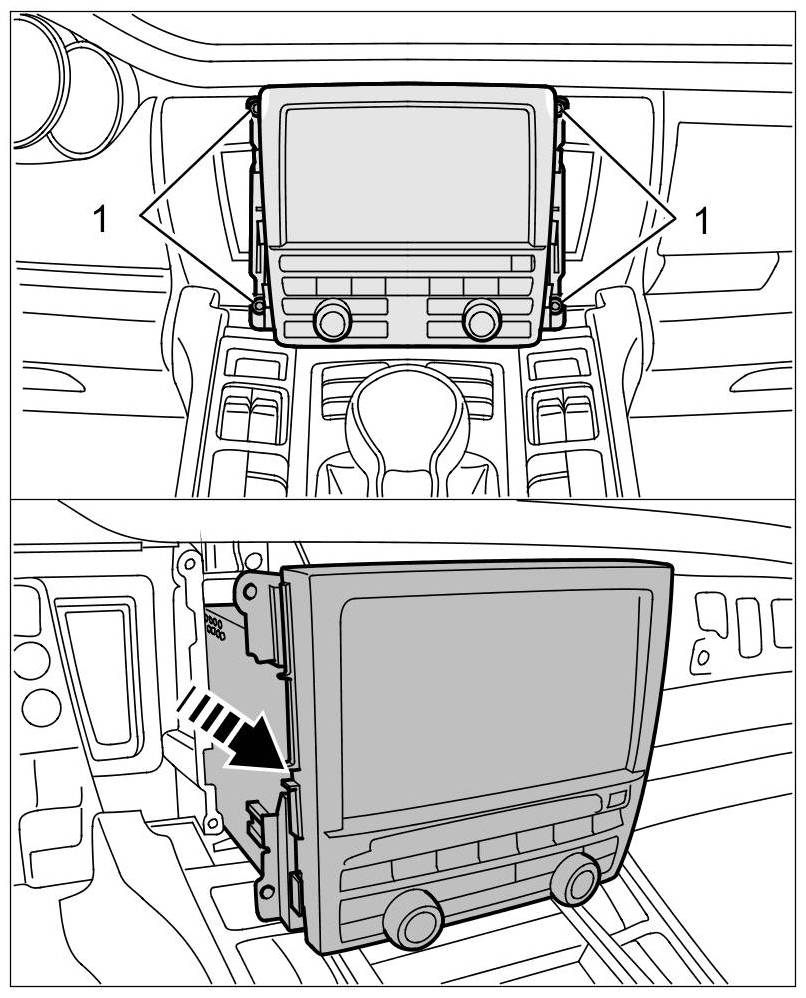
- Unscrewing fastening screws. Release the securing clip -2- for the electric plug connection -3- by lifting the locking lug -a- .
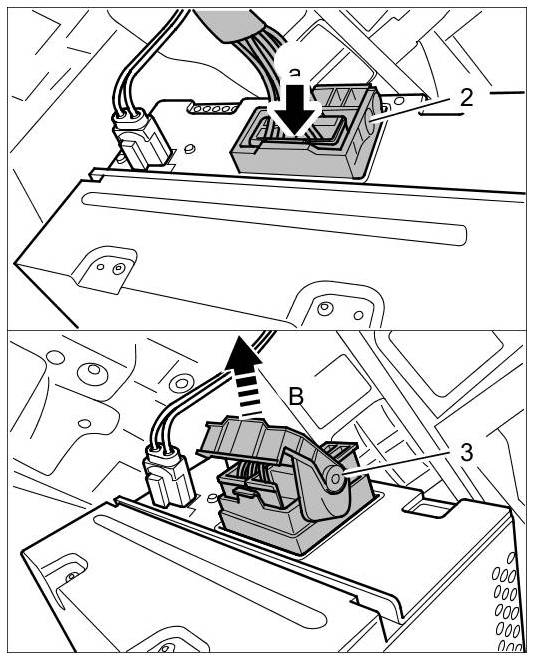
- Release the electric plug connection by opening -arrow B- the securing clip and unplug it.
- Release the electric plug connection -4- ( -b- ) and unplug it.
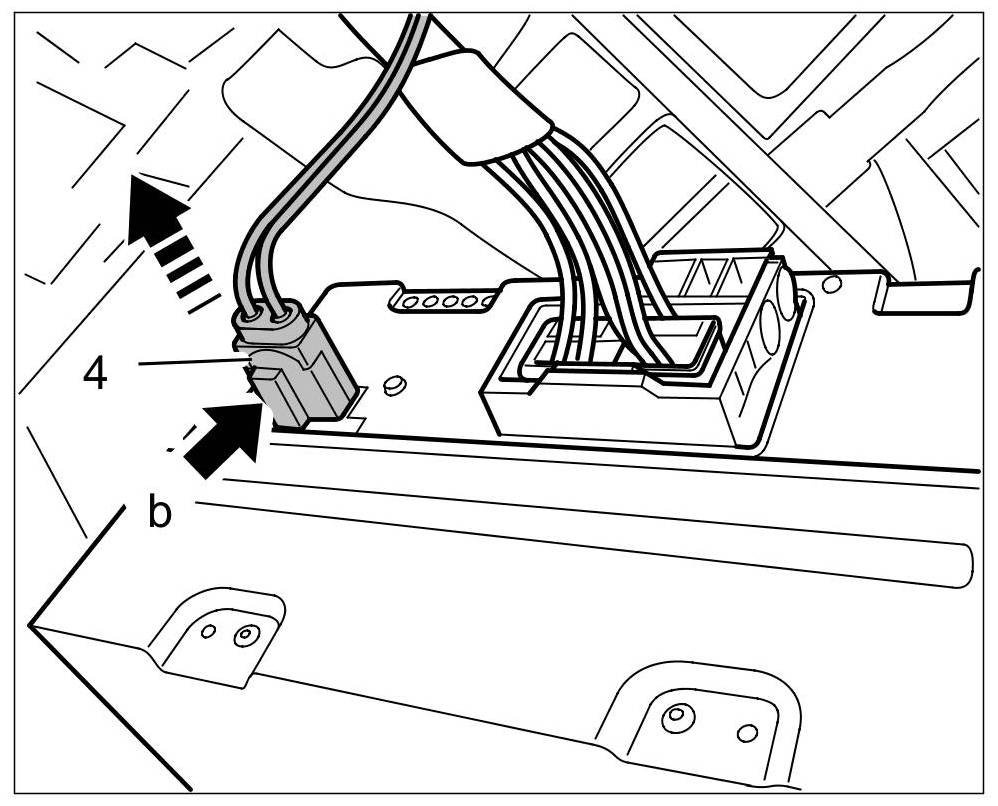
Unplugging electric plug connection
DIY – Panamera Center vent removal
First you need a special position unlocking tool 9827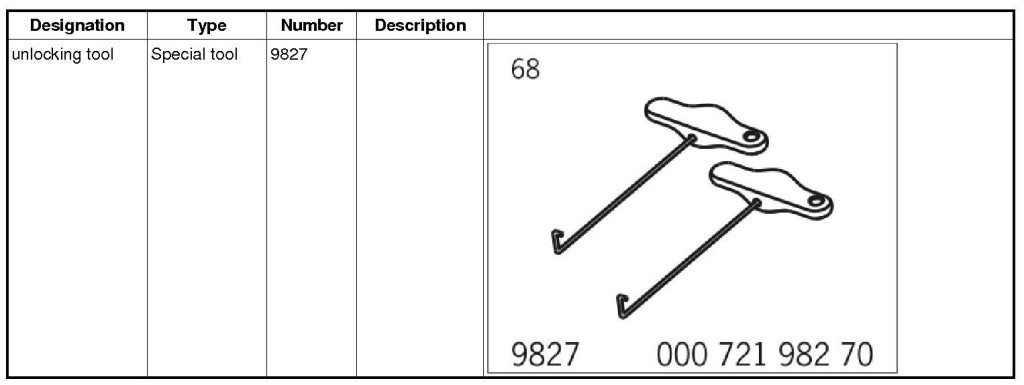
- Insert the first unlocking tool over the third disc from below, fit it at the outside and guide the hook through the opening and onto the metal clips. Insert the second unlocking tool under the first disc from above, fit it at the inside and guide the hook through the opening and onto the metal clips.
- Release air vent.
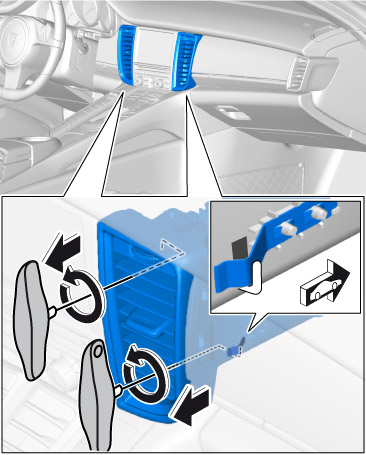
- Release the air vent by turning both tools to the left and pull it towards the rear.
- Disconnect plug connection.
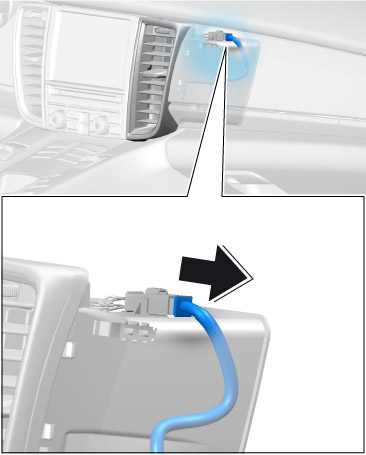
- Disconnecting plug connection
Or you can watch this clip that someone else made http://youtu.be/9rado6bQcJo?t=47s
DIY – How to Replace / Change Air Filter in Porsche Panamera (BMC filter)
Are you thinking of changing an air filter in your 2010-2014 Porsche Panamera? Well, Here is a useful article on how to do the job yourself.
If you are thinking of replacing a filter you may as well go with a high performance filter.
The only Filter everybody uses is a BMC Filter. You can find it on Amazon. Entire job should take you about 1 hour depending on your handyman skills. Its pretty simple if you know what to do and what to look for. Hopefully with this TECH info you maybe able to do this in one hour. Dealer will charge you “1 hour labor rate” for this. To some it’s worth it but for others its not.
Here is mostly what you need. Torx T20, T27, T30, philips screwdriver, some sort of hanger wire hook to pull out a small tab and regular screwdrier to disconnect plugs.

1. First you have to take out Two T20 screws out from the fenderwell on each side

2. Then pull the plastic fenderwell towards you to expse the harnes to the amber marker light. Then you will see a metal tab on the marker plug. Press on the metal tab and pull out the plug (this is very easy but it took me 15 min to figure it out). Just press on the metal wire and pull the plug out.


3. Once you disconnect the harness, you will see a metal tab (closer to you), press on it and push the marker out.

4. Then pull the plastic even harder and look up into the area where bumper meets the fender. There is one T27 screw that holds the bumper to the fender. Its right at the end of each side of the bumper inside of the fenderwell


5. Open the hood and take the plastic cover off from the top of the bumper to expose more screws holding the bumper. Watch out – if you do this wrong you will break some tabs off. Take a flat screwdriver or one of these tools to remove panels (from harbor freigh or any other auto store) and pull up on the panel starting from the front. Rear of that panel has tabs that you can break it off. So make sure you start pulling up from the front – left to right and pull the panel towards you to remove it


6. Take T30 torx and remove all 4 screws


7. Now go under the bumper, and remove nine T20 screws


8. Now go to the trunk and get this special too to remove headlights. You dont have to remove entire headlights but you must loosen them up for the ease of bumper removal and reinstallation. Take the tool, and put it in to the engine bay and twish about 90 degrees. That will loosen up the tab that holds the headlights in place. Then just gently pull the headlight out about 4-5 inches. Leave it like that. Again, you dont have to disconnect the harness but if you like – go ahead and completely remove the headlights.


9. I removed one headlight to show you the next step. Next step will be removal of two metal tabs that hold the bumper to the fender on top. These metal tabs have to be pulled out towards the inside of the engine. What you do is get a small wire hanger with a hook at the end. Put it inside of a small hole of that tab and pull. IMPORTANT! Dont drop them (like I did – it took me an hour to find them once they fell into the insides of the bumper).


10. Now the bumper should release a little bit to expose plug to the parking sensors harness. Take a screwdriver and press on the tab to disconnect the plug


11. When you pull out the bumper, passenger side also has a headlight washer hose attached to it. I have not disconnected it because I didnt want any spills. So what I did, I moved the bumper to the left to gain access to the filter.


12. What you do now is disconnect a plug to the sensor under the filter

13. Take a LONG phillips screwdriver and unscrew all eight scre


Remember – 2nd screw (towards the engine) from the right may need to accessed from the inside of the frame 
14. Lower portion of the filter should drop exposing the filter. Take it out and replace is with your new BNC. New filter maybe a tight fit but dont worry, just put it in. I had to use a screwdriver to push the rubber so bottom and top of the filter box can meet. Note – I have a Turbo in my car but if you have a S,4S or just panamera – it should be roughly the same.


Go to AMAZON.com and get your BMC filter there.
BMC Air Filter for Porsche Panamera 4.8 Turbo & 3.0 D & 3.0 S Hybrid & 3.6 2009+


I hope this helps you guys out.
Also, here are the latest videos of a similar oil change


