Home Blog Page 16

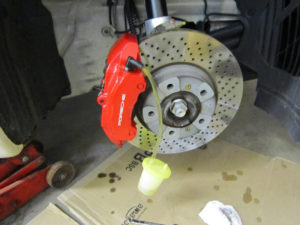
DIY – Front brake caliper Replacement on Porsche Panamera

1. Lift the vehicle. How to lift vehicle safely with air suspension.

2. Remove the wheel.

  • Do not open the brake system.
  • Do not loosen the brake hose from the brake caliper when loosening the brake caliper.
  • The core of the warning contact wire must not be left exposed! It does not matter if the insulation is worn.
  • If necessary, remove a little brake fluid from the reservoir by suction in order to prevent an overflow when the disc brake pads are pushed back.
  • To gain better access for removal of the brake caliper, turn the steering fully either to the right or left.
  • Protect brake caliper from paint defects using a suitable cloth
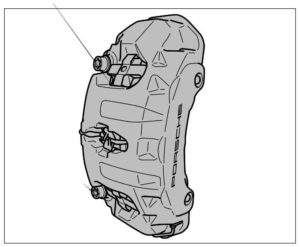
cal1
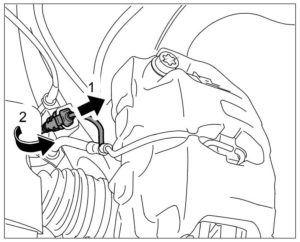
  1. Release and unclip the connector for the brake pad wear indicator -1 and 2- .
cal3

Connector, brake pad wear indicator

  1. Set the disc brake pads back slightly and uniformly using water pump pliers.
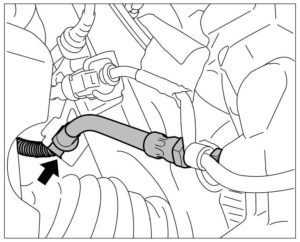
  2. Detach the retaining clip -arrow- for the cable of the brake pad wear indicator from the brake line.
cal4

Brake line holder

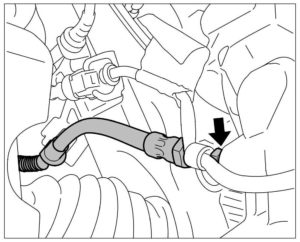
  1. Disconnect the brake line -arrow- on the brake caliper and collect the brake fluid in a suitable container.
cal5

Brake line on brake caliper

  1. Close off the brake line with a suitable plug.
  • Never use an impact bolter to loosen and tighten the brake caliper on the wheel carrier.
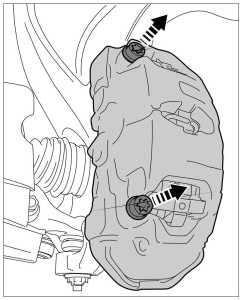
  1. Remove brake caliper from wheel carrier => Brake caliper fastening screws.
cal6Brake caliper fastening screws


Installing front brake caliper

The brake caliper is installed in reverse order.

Information

  • Never use an impact bolter to loosen and tighten the brake caliper on the wheel carrier.
  • Visually inspect the thread for the brake caliper and blow it out carefully if necessary using compressed air. Use goggles!
  • Observe correct tightening torques -> 4X00IN Tightening torques for the brake system.
  1. Fit the brake caliper.
1.1. Carefully fit the brake caliper and screw in assembly pin or a bolt in the top thread only by hand.
1.2. Screw in bottom brake caliper screws several turns by hand (this protects the thread!).
1.3. Remove assembly pin and screw in top brake caliper screw several turns by hand (this protects the thread!).
1.4. Screw in both brake caliper screws fully and tighten to the specified tightening torque.
  • Do not bend the brake lines.
  • Secure brake line holders at the wheel carrier.
  • For easier access to the holders, turn in the wheel carrier as required.
  1. Attach the brake line to the brake caliper.
  2. Fit the retaining clip for the cable of the brake pad wear indicator to the brake line.
  3. Clip in the connector for the brake pad wear indicator.
  4. Position disc brake pads by operating the brake several times.

Subsequent work

  1. Bleed the brake system. -> 470107 Bleeding brake system – see Bleeding Panamera Brakes
  2. Fit the wheel. Use assembly aids to help yourself align the holes (assembly pins) .

  
Bedding in the brake parts

New brake pads require a bedding-in period of approx. 200 km (124 miles)! Only then do they achieve their best friction and wear coefficient! During this period, the brakes should only be subjected to full stress at high speed in emergencies! 

Read on: How to bed in your brakes ?


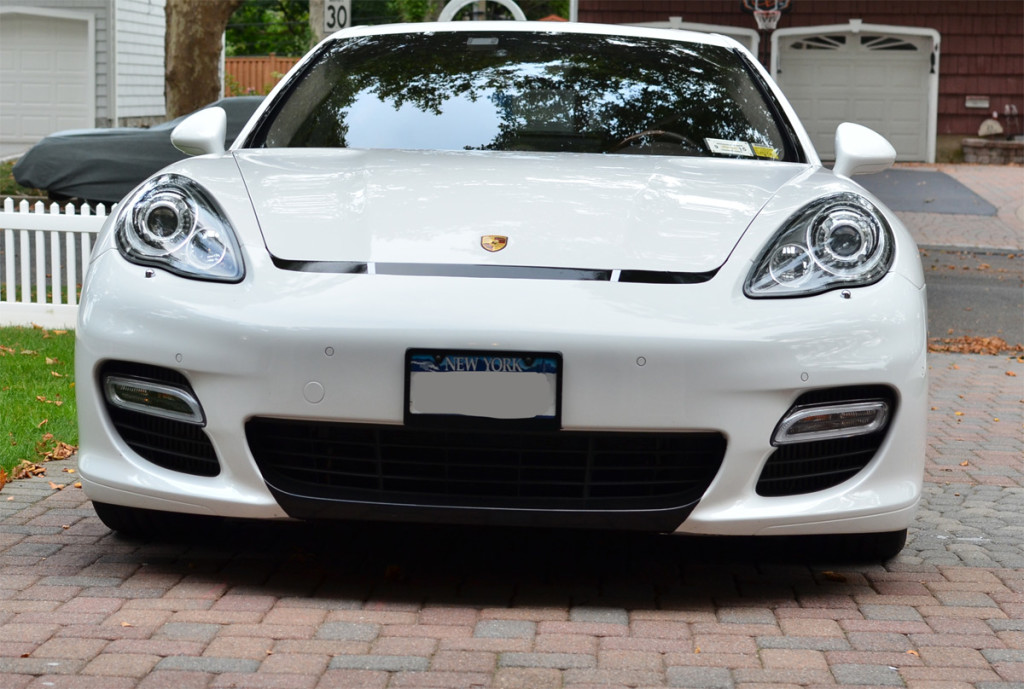
DIY – Panamera Turbo bumper to GTS Sport bumper under $30

Well, if you like the GTS sporty package with sport front bumper – you will like this article.

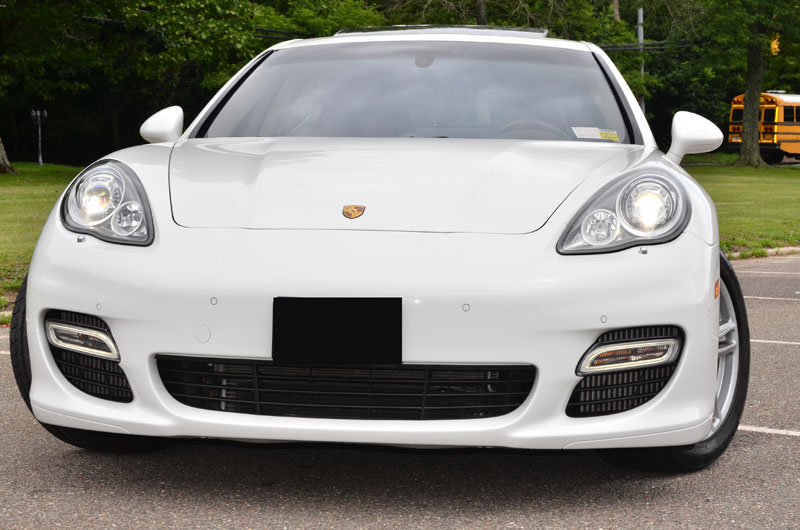
Of course you can go and get a new bumper for $2000 + paint from the dealer or $1500+ paint from ebay if you are lucky enough to find one.  But if you dont want to spend that kind of money, there is an alternative and it will cost your about $30.

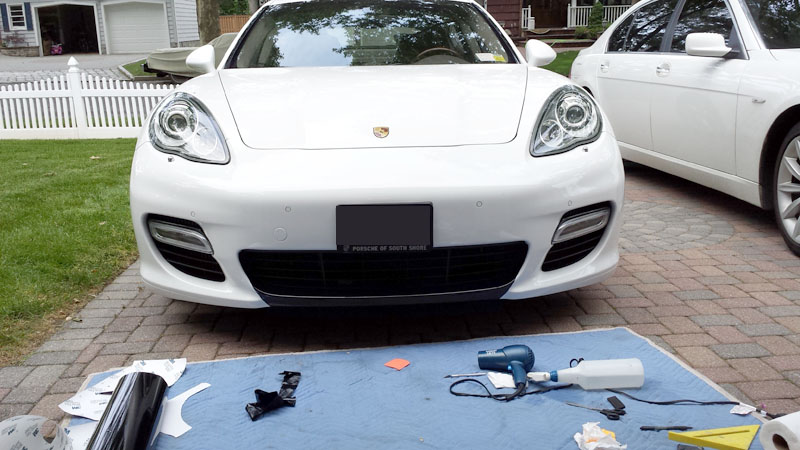
Turn regular Turbo bumper

20140613_1900365 

– TO – 

33

 Here is a small write up on how-to do it:

Basically, I got about 5′ x 2′ of  “3M 1080 black gloss wrap” vinyl tape. You can get that on ebay or just contact us via the website.
Im not a car wrapper but I just took a blade, bottle of water and baby shampoo in a sprayer and layed it out.

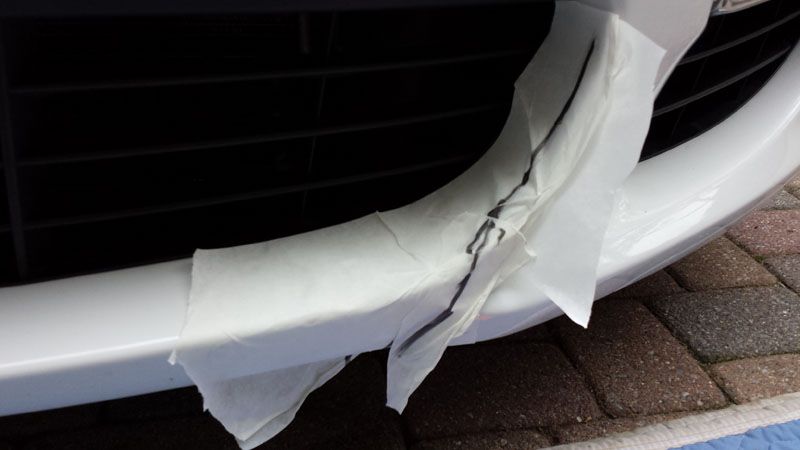
1. First I drew out an outline where I want to place the edges of the tape.  Basically just to come up with a shape that will be traced onto the 3M vinyl.

20140613_181815

2. Then I took a Transfer tape for vinyl decals and put it on top and traced it.

20140613_182040

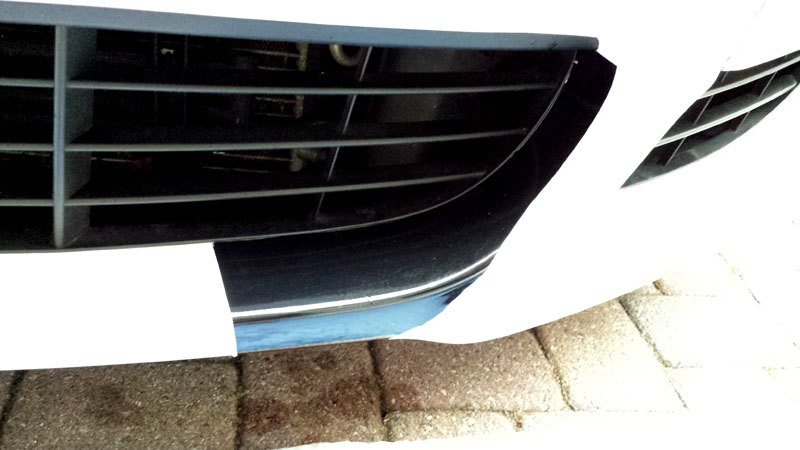
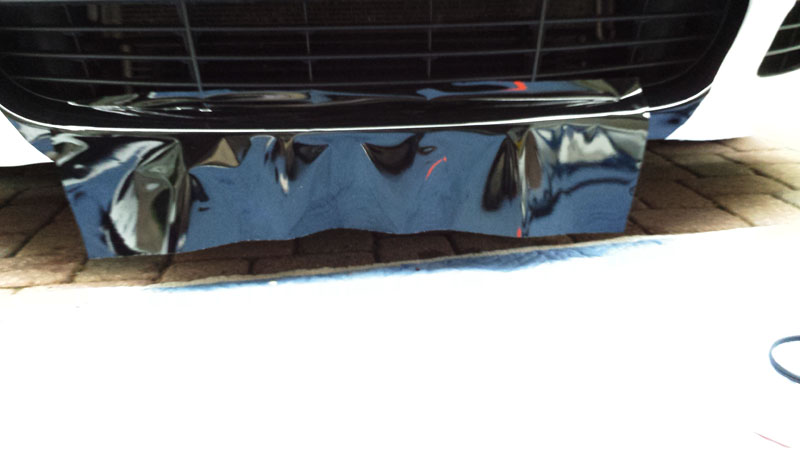
3. I peeled that transfer tape and cut out a shape where the line is. Then I traced in onto the back of the 3M vinyl tape and cut it out. Then I peeled the backing paper, sprayed the bumper and the vinyl with the soap solution and placed it on the bumper where I need it.  Then once it was in place, I squeegeed out the water so the vinyl sticks.

20140613_184204

20140613_183025

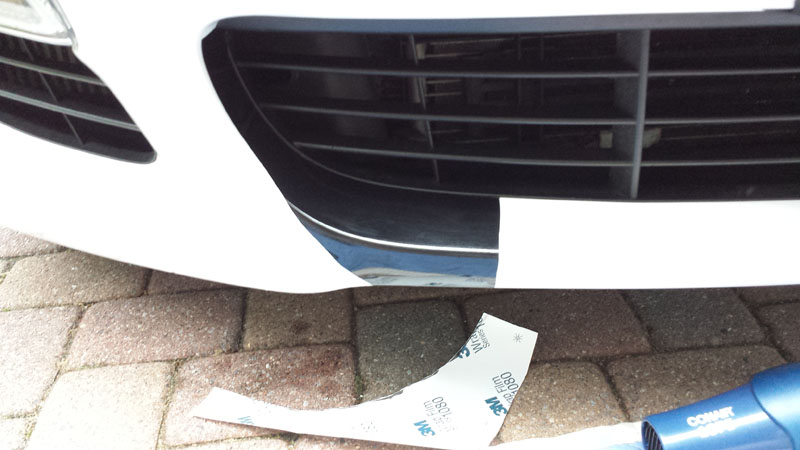
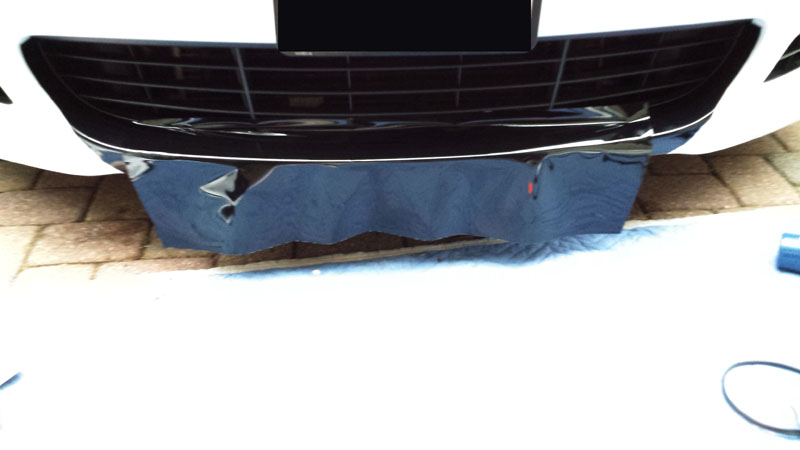
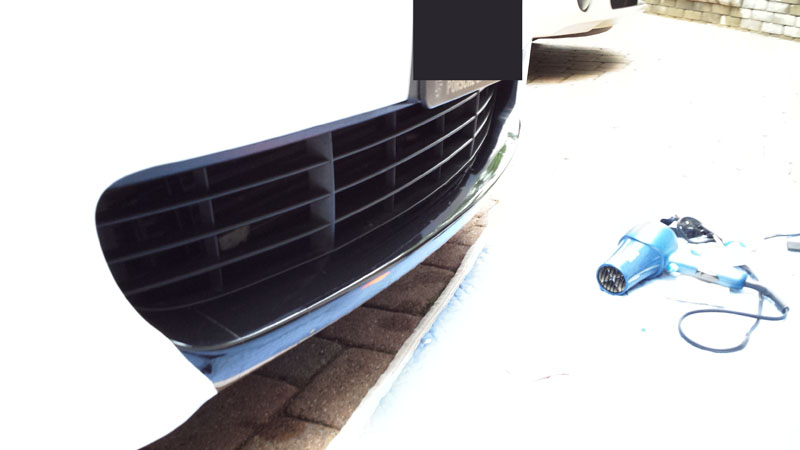
4. I measred the white space not covered yet and cut out a slightly larger rectangular piece from the vinyl to cover it. I peeled the backing paper, sprayed with soap solution and layed it on the car. Solution lets you adjust the aligment. Then I squeegeed the water and cut out the leftover pieces under the bumper.  Keep in mind – if you get bubbles when you squeege the water out – go back with a small needle and punch the bubbles so you get a flat adhesion.

20140613_184502

20140613_184508


 And you are done.

20140613_190010

20140613_190036

Lifting a Panamera – Things you need to know

Preliminary work

  1. When driving onto the lifting platform, bear in mind the work that needs to be carried out!
  1. If the vehicle is a Panamera with air suspension/levelling system, ALWAYS observe the following instructions!

Switching off the levelling syste

  • Switch on ignition.
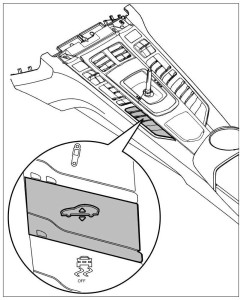
  • Press the High Level control button for at least => Time: +10 s .

The message “CONTROLL OFF” appears on the instrument cluster.

level
High Level control button

Lifting the vehicle

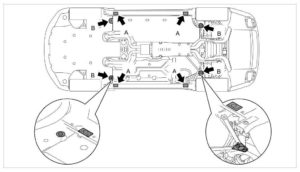
The vehicle can be raised at various jacking points. These jacking points are specially reinforced and can accommodate the vehicle without deforming the underbody. The vehicle must always be positioned at the four outer jacking points -A- first. The four inner jacking points -B- can be used for carrying out repairs around the side members.

  1. Raise the vehicle at the four outer jacking points -A- close to the side members.

Information

When raising the vehicle at the inner jacking points, remember the following:

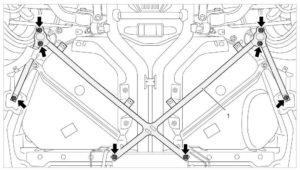
  • Before positioning the vehicle on the rear, inner jacking points, remove the -transverse strut- – danger of breaking the transverse strut! => Transverse strut mounting


level2

Transverse strut mounting

  1. Raise the vehicle at the four inner jacking points -B- .
level3

Outer and inner jacking points for the lifting platform on the vehicle underbody

Adjusting vehicle to Normal Level

Information

It may be necessary to adjust the vehicle to the Normal Level in the workshop.

  • Suspension alignment
  • Ride height measurement
  • Level check

– Adjust from High Level to Normal Level.

– Fill pressure accumulator for air suspension by starting the engine – Save the battery (switch on extraction system).

– If the air pressure in the pressure accumulator is too low, the compressor comes on. It can take several minutes to fill the pressure accumulator. Only then will the air suspension respond to the driver’s request and the required level be activated.

  1. Close vehicle doors/rear lid.
  2. Start engine and operate the brake.
  3. Press the High Level control button in the centre console until ]]High Level set[[ is reached (light in button goes on). Press the High Level control button again ]]High Level off[[ (light on button goes off). The levels are indicated in the instrument cluster.


level

Switching on the levelling system

Switch on the levelling system. To do this:

  • Switch on ignition.
  • Press the High Level control button for at least => Time: +10 s or
level

High Level control button

  • Set off with the vehicle. The levelling system switches on automatically when the vehicle is driven at => a speed of more than: +7 km/h (4 mph).

Panamera Wheel Types, Sizes and Specifications

woem1

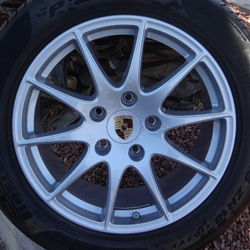
18″ Panamera Wheels – 10 Spoke – silver

Front: 18″ x 8″, 5 Lug, 130mm Bolt Pattern, 59mm Offset   #97036213603

Rear: 18″ x 8″, 5 Lug, 130mm Bolt Pattern, 53mm Offset   #97036213803


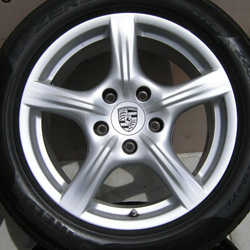
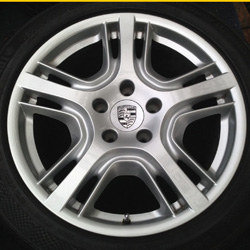
woem218″ Panamera Wheels – 5 Spoke – silver

Front: 18″ x 8″,  5 Lug, 130mm Bolt Pattern, 59mm Offset    #970.362.136.00

Rear: 18″ x 9″,  5 Lug, 130mm Bolt Pattern, 53mm Offset    #970.362.138.00


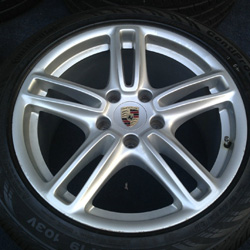
woem3 19″ Panamera Wheels – 5 Triple Spoke – silver   

Front: 19″ x 9″, 5 Lug, 130mm Bolt Pattern, 60mm Offset   #970.362.158.00

Rear: 19″ x 10″, 5 Lug, 130mm Bolt Pattern, 61mm Offset   #970.362.160.00


woem419″ Turbo wheels – 5 double spoke – silver  

Front: 19″ x 10″, 5 Lug, 130mm Bolt Pattern, 60mm Offset     #97036215800

Rear: 19″ x 9″, 5 Lug, 130mm Bolt Pattern, 61mm Offset     #97036216000


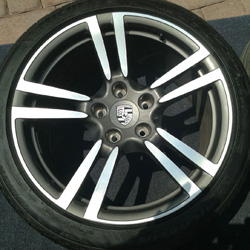
woem520″ Turbo II wheels – 5 Double Spoke – polished

Front: Size: 20″ x 9.5″, 5 Lug, 130mm Bolt Pattern, 65mm Offset   #970.362.178.06

Rear: Size: 20″ x 11″, 5 Lug, 130mm Bolt Pattern, 68mm Offset    #970.362.192.01


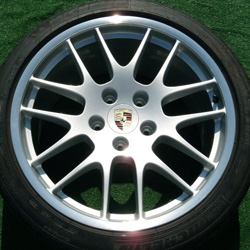
woem620″ Sport Spider Wheels  – 14 Spoke – silver

Front: 20″ x 10.5″, 5 Lug, 130mm Bolt Pattern, 65mm Offset   #970.362.178.05

Rear: Size: 20″ x 11″, 5 Lug, 130mm Bolt Pattern, 68mm Offset   #970.362.192.00


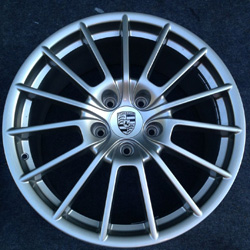
woem7a20″ BBS Sport GTS Wheels – 15 Spoke – GT silver & GTS black

Front: Size: 20″ x 9.5″, 5 Lug, 130mm Bolt Pattern, 65mm Offset     silver: 970.362.980.05 970.362.980.00

Rear: Size: 20″ x 11.5″, 5 Lug, 130mm Bolt Pattern, 63mm Offset   silver:970.362.980.06  970.362.980.01

Bleeding Panamera Brakes

Bleeding

Tools

  •  Use only new DOT 4 brake fluid. Container quantity: 1 litre = 000.043.203.66. 30 litres = 000.043.203.67.
  • 11MM wrench, bleeder pump (optional), Turkey baster, hose/container to collect fluid pumping out
  • The brake fluid change interval is two years, using Super DOT 4 brake fluid (you can use Valvoline Synthetic)
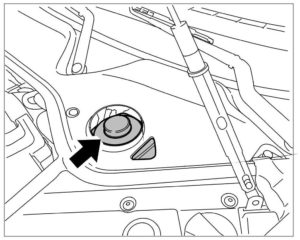
  1. Open the reservoir.

 br1

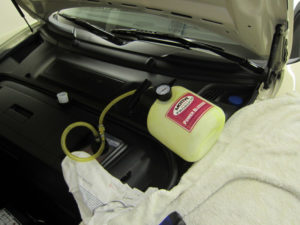
  1. Use the “turkey baster” (kitchen tool) to take old fluid down to the MIN mark only.  Re fill with fresh fluid. Connect a bleeding device to the brake fluid reservoir. Switch on the bleeding device. Pump it (5-7 lbs is pleanty)… Note, I only used the power bleeder for the pressure and had to keep re filling the reservoir. Don t let it go past MIN.. or you can put fresh fluid in power bleeder and it will keep the reservoir full.

 br6

Information

  • Always bleed both bleeder valves on the brake caliper.
  • Bleed the outer bleeder valve first.
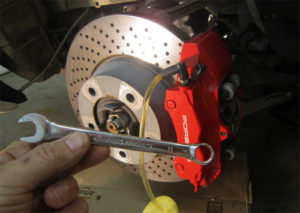
  1. Each brake caliper had two 11MM nipple nuts on the top. Start with the rear right inside nut. Open and have hose connected to collect fluid. Do not turn the nut too many times or it may come out. Fill the small container and tighten nut. Do not over tighten. Then do outside nut and move to the other rear wheel and repeat. Always check power bleeder and reservoir to avoid running out of fluid. You do not want air inside the system.
    Front V (Below)
  2. Continue the bleeding procedure at the brake calipers. Do so in the following sequence: rear right/rear left/front right/front left.
  3. Use a transparent hose and a collecting bottle to check the escaping brake fluid is clean and free of air bubbles and to determine the amount of brake fluid used.
  4. Open each bleeder valve until clear, bubble-free brake fluid emerges.
  5. Tighten the bleeder valves to the specified tightening torque and remove the bleeder hoses.br5     br7
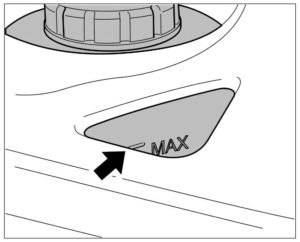
  6. Remove bleeding device from brake fluid reservoir and screw cap on. The brake fluid level in the brake fluid reservoir must be between the MIN and MAX markings once the vehicle has been filled and bled. Adjust the brake fluid level if necessary.
br2
  1. Generate vacuum in brake booster by starting engine. Check brake-pedal travel and pedal feel.

Notes: Always use sealed bottles of brake fluid. Open containers are subject to moisture.
I cleaned wheels while off and left the calipers under pressure after bleeding to ensure no leaks.
If its your first time I can not stress enough not to let the system go below the MIN mark during this procedure.

Checking after bleeding

Information

  • If the pedal travel is too long or the pedal feels too soft when applied, carry out the following procedure.
  • Two workers are required for this.
  • Also carry out this procedure if the brake hydraulic system was largely empty.

Connect a bleeding device to the brake fluid reservoir. Switch on the bleeding device. Bleeding pressure is approx. 2.0 bar.

  1. Open bleeder valve at rear on right-hand side, then push the brake pedal all the way down about 5 times and tap the brake caliper gently several times with a rubber hammer during the bleeding process.
  2. Hold for 2 – 3 seconds after each depression, then release pedal slowly. After applying pedal for the fifth time, hold pedal down and close bleeder valve.
  3. Repeat this procedure in the sequence rear left/front right/front left.
  4. Tighten the bleeder valves to the specified tightening torque and remove the bleeder hoses.
  5. Remove bleeding device from brake fluid reservoir; correct brake fluid level is necessary.
  6. Generate vacuum in brake booster by starting engine. Check brake-pedal travel and pedal feel.